Friday, June 15, 2012
Driving Range Information
A timely article hit my in box last week about driving ranges and how to manage the tee deck. Go to here for complete article but I'll try a quick summary in this post. Basically, the article references a method players can use to limit the divots and speed the recovery time for a driving range tee to keep it in good shape during the season. The number crunching I love is the one that compares the two styles of hitting balls. The willy nilly, all over the map style of hitting balls removes 4.1 sqft of turf after hitting 30 balls versus the linear style of divot removal which only removes 1.4 sqft of turf after hitting 30 balls....a 65% reduction! FYI, the recommended size of a driving range tee is 1 to 2 acres minimum (that is 43 560 to 87 120 sqft) to allow for sufficient hitting areas and recovery of the hitting area. The tee we just built is about .35 of an acre or around 16 000 sqft (versus 0.12 or just over 5000 sqft which was the size of the old tee deck). Obviously, we were limited based on the area available but I think we should be O.K. If I can get the message out about conserving turf by controlling divot removal the tee should always be in good shape, I hope.
Thursday, June 14, 2012
What we've been up to: the Good and the Bad
For the usual reasons I've been a little behind on updates but this post will be a flurry of quick info and pictures with the hope letting people know what's going on.
We've already aerated and top dressed all the aprons and collars and I hope to do one more session near the end of this summer since this time out we went with smaller tines (there was some comments on how soft they were last year when I aerated them) to lessen the disruption.
One of the absolute worst jobs in almost complete. Edging bunkers is no fun no matter when or how you do it but it's been a while since they've been done so it was definitely time. This time out I am cheating a bit and leaving a lip around the entire perimeter of the bunkers. Normally, we pull the sand up flush with the back lip but this allows the grass to creep into the bunkers which blurs the bunker edge. By creating a lip all around a bunker I hope to limit the maintenance involved in weeding when the grass creeps in.
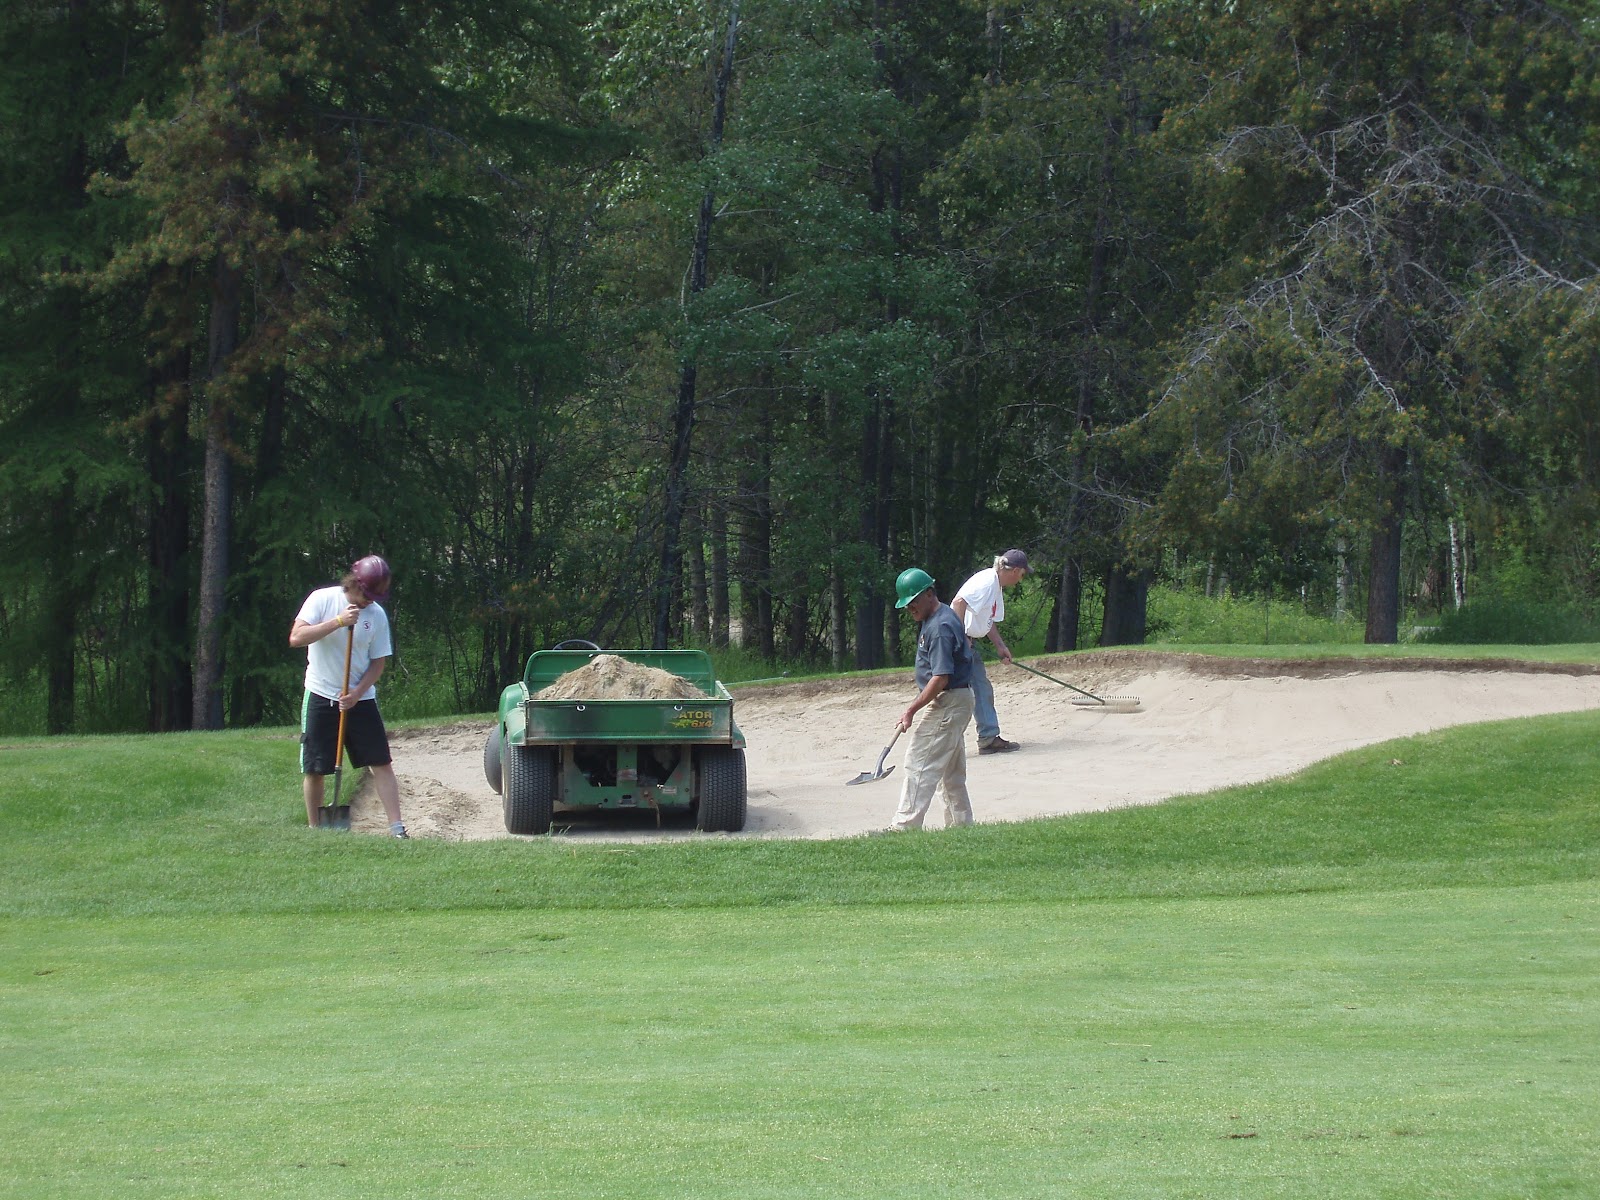 |
| Best Bunker Edgers I got |
Some other things we've done include fertilizing tee's. Although the process went well the result were brutal:
 |
| Sh*tty Fertilizer Application |
 |
| Fusarium |
Another ugly thing you may be seeing on the course relates to a type of winter damage I've yet to talk about.
 |
| Vole Damage |
 |
| Top Dressing the Vole Damage |
Other ugly things we are doing include expanding the mowing on certain tee decks. Picture says it all:
 |
| 4T "Expansion" |
 |
| Small, Little Seed Head Spots |
Thursday, June 7, 2012
Trying to Figure it Out
It's probably the farthest thing from your mind but this post is a review of winter damage we experienced this year. One thing I am learning is just as it takes multiple inputs to make the turf appear good it also takes more than one thing to cause damage. I am always looking for common denominators to explain damage. It's only with the benefit of hindsight do I think that one of the factors impacting spring conditions was the level and condition of the snow cover on the greens this past winter. All the areas damaged this spring were prone to poor snow coverage during one or multiple times through out this past winter.
What about the wrinkles of green under the tarp on #1 green? This was where the semi-permeable tarp created insulating air gaps between the turf and the ice (a case for insulating greens prone to early season melting, i.e. bubble wrap).
What really got me thinking about this was comparing the snow pack (depth and consistency) between 12 and 13 greens. In late February there was 8" of tight corn snow on 12 green over a 1/2 of surface ice. On that same date 380 yards away on 13 (a green with the same aspect) there was 16" of loose corn snow over an ice free and thawed surface. Why? Both are surrounded on the left and back by trees but the trees on 13 are much farther away so, it is my theory, that the trees influence (in this case shelter from snow) was limited; i.e. less shelter from the trees on 13 so more snow on that green versus 12.
The damage on the front left of 1 green, I think, was caused by the trees acting as a heat sink. During sunny days they would absorbed heat and radiated it at night. Stupid sounding I know but I've been around enough times to see the snow melt first on the south west side of these trees to know that it is a very common occurrence. This happened a few times early in the spring and combined with the snow events we experienced in March I think that area went through a series of melts that created a number of freeze/thaw cycles that ultimately killed the turf.
 |
| Front Left #1 Green |
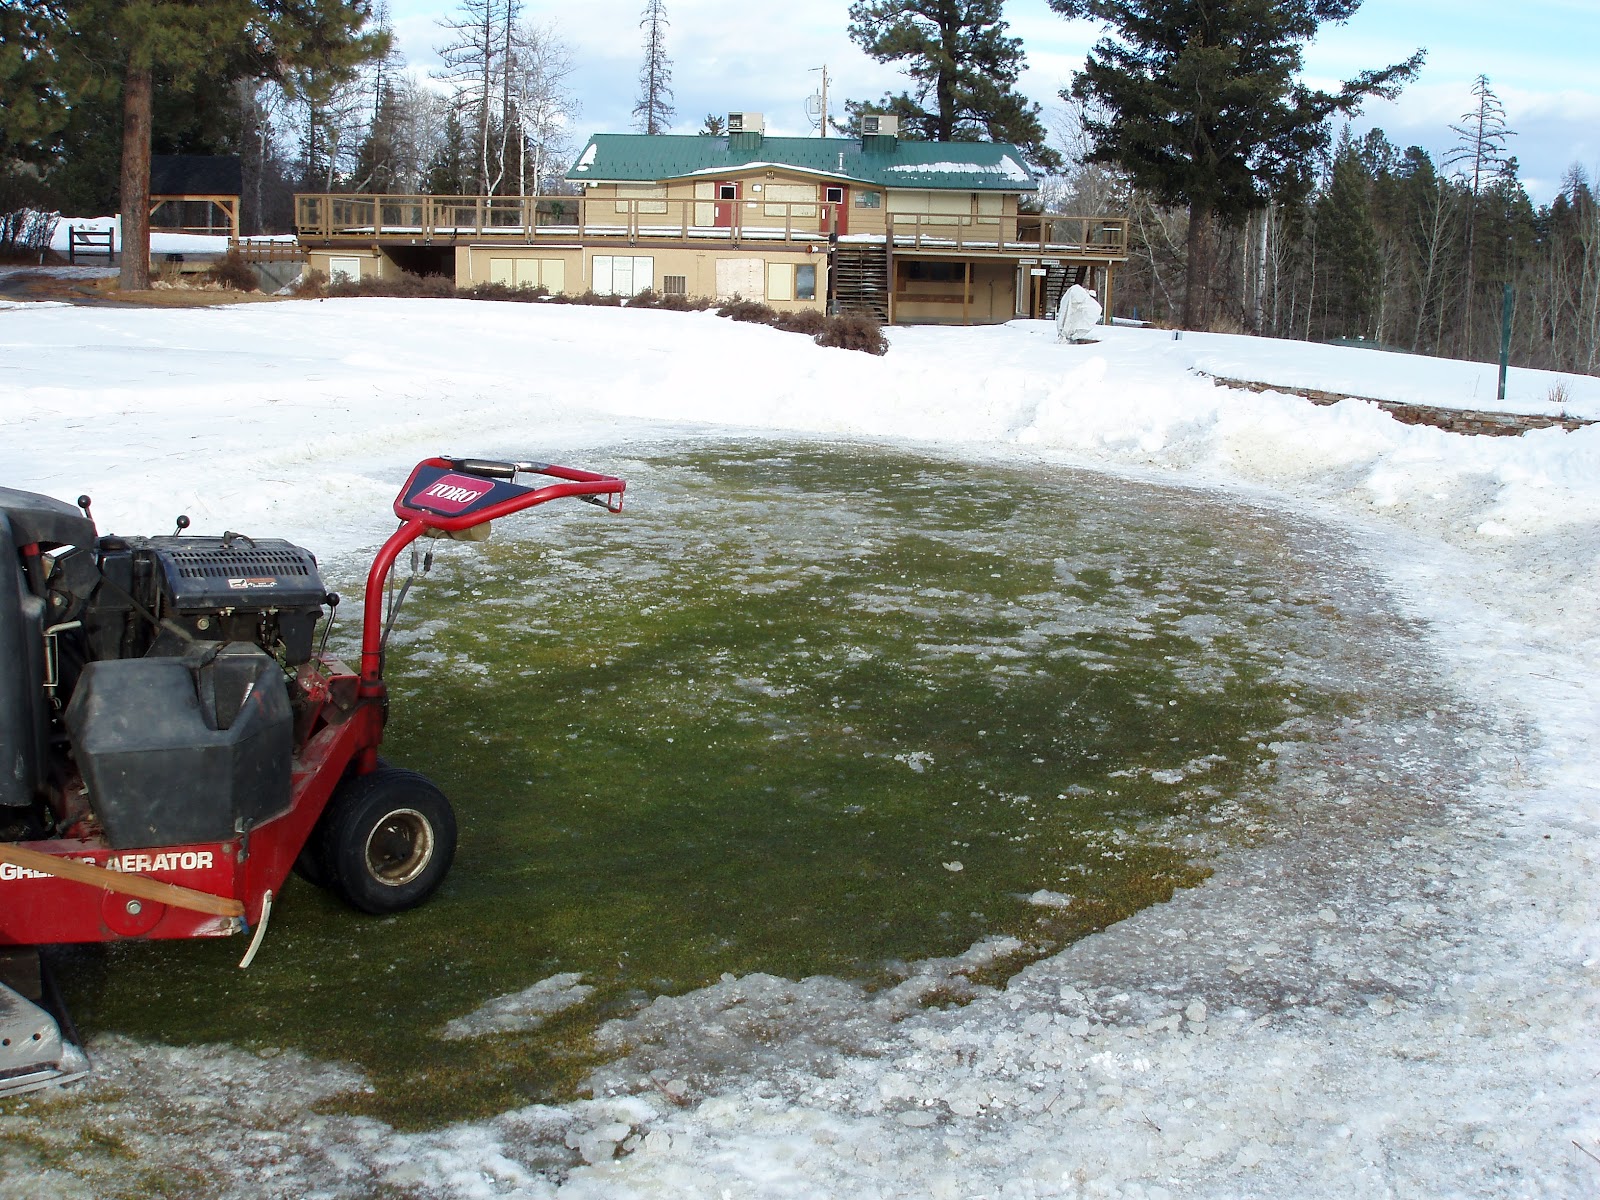
Now the putting green.
It too is prone to early season melting and freeze/thaw exposure. I've never worried about it because of the bent grass component. This time out I think the green was unhealthy going into winter and did not have the CHO reserves to cope with the freeze/thaw and ultimate anoxia created from the ice layer that developed. For this green it was probably that one-two punch that caused all the problems since the lower half, which was completely playable early on, had the same lack of fertility but no ice.
 | |
| New Putting Ice Layer |
What about 9 green? Remember this?
I exposed it thinking the damage was done so what could I lose? Interestingly enough while the back has mostly recovered it is those area on the right side that I did not touch in February that are still slow to come.
Probably that damage relates to the melting of the snow I did in early March. During that time the temperatures ranged from -14 to +10 and I think the mistake lies in melting the snow too fast (creating free water) and too early. At the time I was concerned with a slow melt and freeze/thaw damage. It may have been better to blow what snow I could, melt any ice and then tarp the green.
 |
| Ice Removed From Back #9 Green |
 |
| #9 Green One Day After Black Sand Melted Snow |
All these areas struggle with shade during the spring and fall but so do other greens and they weren't damaged. But, again I think, a possible common denominator is the condition of the snow cover. Most all other greens had a deep snow pack and were slow to melt. The real kicker for me is the damage on 12 green. The worst area is the spot where I exposed it very early thinking I was limiting the ice damage. The rest of the green that I left covered was still damaged but has recovered faster than that back tier that was exposed earlier -- opposite as to what has occurred on #9 green.
Next winter it will be a different story. I know this is long winded and awkward and maybe I've over explained stuff but I think with the way this spring has shaped up for golf courses in this area people should know that the choices made when dealing with winter can have different results within a golf property let alone different results between golf properties.
Next winter it will be a different story. I know this is long winded and awkward and maybe I've over explained stuff but I think with the way this spring has shaped up for golf courses in this area people should know that the choices made when dealing with winter can have different results within a golf property let alone different results between golf properties.
Subscribe to:
Posts (Atom)